
 |
Designing and Testing Electronic Circuits
To build a circuit you need to make good electrical connections between components. You can do that by soldering them together - but that is rather permanent... and if you want to be able to test and then adjust your circuit you need to be able to add to it easily and change things - without having to bin all of the components if your first attempt doesn't work! You want to have some way of easily adding and removing components to a circuit. Before the 1960s that would have meant using a technique called 'wire-wrap'. Wire wrap was a process that involved using a wire wrap board - which was a board that had permanent conductive posts on it. You could connect components to each other by wrapping their connectors around the same post.
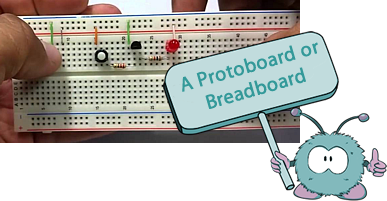
Although this method is still used today, there is something that makes 'prototyping' much easier - using a 'protoboard' (also known as a 'breadboard'). On a breadboard it is easy to add and remove components to a circuit and you do not have to 'wrap the wires' - making it less likely they will snap off.
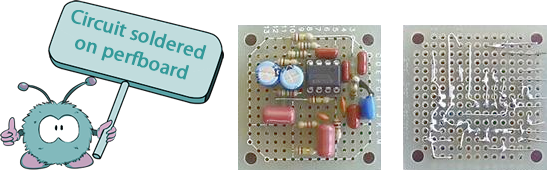
When you have wired up the circuit and tested it on your protoboard/breadboard you can then move to the next stage - using a perfboard (so called because it is perforated - so you can easily push the component connecting leg wires through - and you can then permanently solder your components in place by soldering the back of the board (see photo below).
|
Follow me...
|
 You design your circuit in the form of a circuit diagram, but to be sure it works you need to test it.


Cyberphysics - a web-based teaching aid - for students of physics, their teachers and parents....
